Information & advice for making your own life cast.
This is not a tutorial, teaching or educational site.
All material placed on skin should be certified skin safe.
The model should be aware of any skin or other allergies, along with other concerns, prior to a work session.
You should not attempt making body molds without proper tools, materials, or instruction.
Before You Purchase a Life Casting Kit
Home kits all use an Alginate to make the mold, which is one of the materials professionals use. Professionals also use a skin-safe silicone, however, that is more advanced and should not be attempted by a novice.
Alginates are mostly powder but may come as a kind of gel. All of them will be mixed with water.
The kits also contain some sort of plaster or gypsum to mix with water and pour (cast) into the mold.
Some kits may contain extra material in case you make a mistake and need to try again, some do not. Kits may also include a stand or hardware for mounting or displaying the final piece.
If you are able to download the instructions before you purchase, do that.
Make sure you understand what is involved and how different products compare.
I recommend using a product that has a simple mix ratio, like 1:1 or 5:1. Some have odd ratios, like 5.8:1 or 4.32:1. It can be done but you'll likely need a calculator to figure out how much water you'll need. Measurements need not be EXACT but they do need to be close.
Life Casting Begins With Proper Preparation
This process is messy.
Put down plastic bags or papers to catch any drips.
While safe for the skin, Alginate does not come off of clothing very easily, if at all.
Cover any clothing with a plastic bag to catch drips, especially when casting the face or chest.
The warmer the water used to mix with the alginate or plaster, the faster either will set up.
The instructions will likely give you a recommended water temperature and you should go with that which will typically have from 3 to 5 minutes set time.
If there isn't a temperature recommendation, water at approximately 90° is a good start for first-timers.
If you have more experience, or feel you can move quickly, then warmer water temperature reduces the set time. Colder water will end up with a longer set time: possibly as long as 15 minutes or more, depending on how cool.
The life casting process is not friendly to hair or clothing
Plaster & alginates (as well as silicone) cling to hair & clothing; cover hair & clothing to protect them.
If you wish to include clothing as part of the mold the clothing will have to be coated in a release agent, typically Petroleum Jelly. Needless to say, this will likely ruin the clothing but is an option.
I do not recommend putting Petroleum Jelly in the hair. Professionals will sometimes use a Cholesterol Hair Product to minimize hair from sticking to plaster or alginate. I consider this an advanced technique and I do not recommend trying it.
If you are working near the region with facial, armpit or pubic hair, I suggest shaving first.
Making the life cast mold
The smoother the mix of alginate, the better the finished results. Stir while pouring the alginate & water together, working out lumps as you go.
Time is not your friend. Work quickly but thoroughly as you mix.
Have the hand (or foot) being molded dipped into the alginate, then pull out to drip off, checking for lumps and air pockets. Then place the hand (or foot) back into the alginate and wait for it to set up.
Casting plaster into the life cast mold
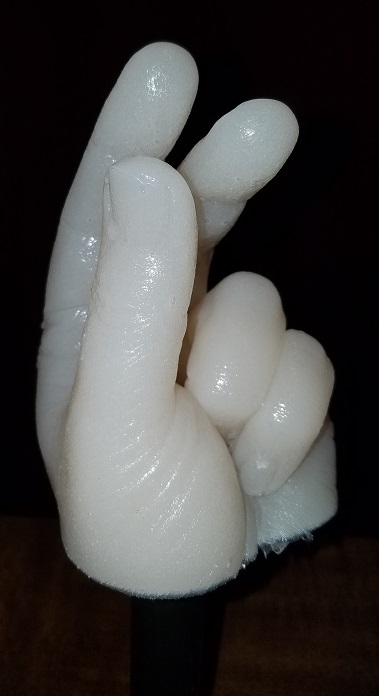
If you're putting a hand in a container of alginate, do not bend the fingers 90° or more; when pouring plaster into the mold air will be trapped at the end of the fingers, preventing the plaster from reaching the end, resulting in the finger tips appearing to be cut off.
If the fingers are bent too far, pour a small amount of plaster into the mold's finger tips, then tilt the container up and around to allow the air to escape. Some plaster may drip out of the container, but that is okay. Do this process twice and then fill the mold. It takes some practice and may not come out the first time.
The other option is to vent the end of the fingers within the mold but that is more advanced than can be detailed here.
Finishing the life casting process
When pouring plaster into an alginate mold, the one thing not always mentioned is there is usually some cleanup of the final plaster piece required. This is normal.
A sharp bladed craft knife can easily cut away tiny bumps where there were air bubbles.
A tiny bit of plaster can be placed into voids where there were lumps of alginate in the original mix. Be careful when applying and wipe off any excess plaster right away or it will stick to the final piece as it dries and be hard to remove.
PLASTER ON SKIN: WARNING
When applying plaster bandages directly to the skin: DON'T!
Plaster will bond with the skin.
People have had to go to emergency rooms to have the plaster removed. It is a painful process.
Some plasters generate heat as they cure, causing serious burns.
I don't recommend this method. I know there are a lot of examples on the internet and people want to try.
If you're going to do it, follow these important steps:
- ONLY USE MEDICAL GRADE plaster or plaster bandages
-
- DO NOT put construction plaster on skin!
- some plasters generate a lot of heat as they cure, causing serious burns
- Shave or otherwise remove as much hair as you can
- Wash the skin area to get as clean as possible
- This process is messy.
-
- Put down plastic bags or papers across the lap and on the floor to catch any drips.
- Plaster won't come out of clothing easily, if at all.
- APPLY RELEASE AGENT !!! This is crucial!
-
- A proper kit will come with a release agent: use it!
- If no release agent is supplied:
- Liberally apply petroleum jelly (vaseline tm) over the skin AND any remaining hair.
- Apply beyond the area where the plaster will go.
- DO NOT USE BABY OIL or other oil, it will not release the plaster from the skin as effectively.
For Breasts: where to start....
If working with bandages: cover nipples first with two narrow strips, in an "X" pattern.
From there, placing bandages over the top of the shoulders and down the back a few inches as support for the rest of the bandages going down the front helps hold it all in place.
Make sure you put release agent all over that area, and beyond, as well.
You may cut the extra shoulder pieces off the finished work.
Safety and comfort of the model is most important.
Again, I don't recommend this method, but if you're going to do it, do it right.
I prefer to use an alginate or skin-safe silicone: the process is safer, the results are better, it doesn't take any longer, and the process is more comfortable for the model. Plus, petroleum jelly is difficult to wash off, whereas the other materials come off cleanly.